We have been working on a new project in our garden for over a year now. We are growing worms! Emma tells me that I really shouldn’t phrase it like that because it sounds like I have a terrible medical condition! However I saw this thing online and I had to try it.
Some back round information: Summer 2012 we planted a bunch of tomatoes and tomatillos. We had a pretty decent harvest, but as the season should have just been really rolling, we saw our bushes dying daily. At first I thought it was a blight of some kind but nothing really matched up. We spent a few weeks doing all that we could to make the vines survive but it was spreading fast and furious. We pulled out vines that were going bad, we soaped up the vines next to them trying to protect them, we just tried everything we could think of. We aren’t fully organic, but I do try to avoid chemicals and pesticides as much as possible, so I chose not to use them on this.
The more we researched and looked and compared, the more convinced we became that we had some kind of fungus in the soil. The most common recommendation we could find for this was to completely empty our raised beds and get all new soil. Well I wasn’t satisfied with this. First of all, where do I put the old soil? How can I afford to bring in all new soil? If it weren’t in raised beds would I be expected to dig up an entire yard? How did the old timers deal with this sort of thing?
Then I saw a program about a worm farmer. He has quite a business cultivating worms for retail and wholesale. He talked about how worm castings are some of the best fertilizer and they are voracious eaters! He talked about how they can recycle yards of earth in just weeks and turn the grossest things into great things for gardens. So I thought……….if they can do all that, wouldn’t it make sense that they could eat and digest my fungus and make it go away? It made sense to me! I had to do a bit of convincing on the hubby, but he was willing to try. And so began the great worm experiment.
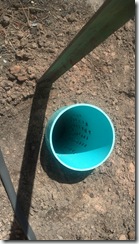 The only expensive part of the process is the sewer pipe. You can get it in various lengths, even have it cut to size in the store. You have to figure out how deep you need it to reach the bottom of your bed and then have about 1/3 of it sticking up above ground. Before planting the pipe you have to drill holes all over the bottom 2/3 of it. Drill so that you have holes about 2 inches apart, use 1/2 bit. These become the worms entrance and exit points, so the holes have to be big enough for a worm to wiggle through.
So drill those holes and then dig out a hole in the bed to fit the pipe. Carefully backfill around the pipe.
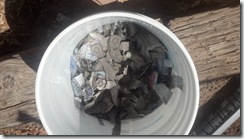 Next, the worms like wet newspaper. Don’t ask me why, I don’t know, just do it! So you shred up a bunch of newspaper, none of the shiny stuff, just good old newsprint, then you soak it good. Take that wet mixture and put a few good hands full of it in the bottom of the pipe.
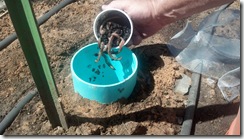
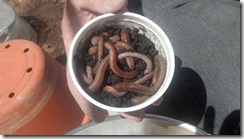 Now for the worms! You can spend a lot of money on worms if you want to, I’m not sure it makes much difference though. We chose to go down to the local hardware store and buy good old redworms from the bait fridge. We got a very generous amount for about $3. I estimate there were at least 20 – 25 worms in each container. We dumped those right on top of the newspaper.
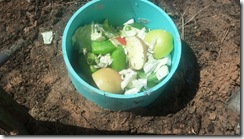 Now some food! Worms needs munchies and kitchen scraps fit the bill. Worms don’t really care for too much citrus, but eggshells, any green veggies, most fruits, basically whatever you would feel good about putting in your composter you can put into the pipe for the worms. Now we have 6 raised beds that are 20x4 feet, and I wanted 1 worm pipe per bed. At first I was certain that we would never have enough scrapes to feed the worms, but we do! It’s kind of amazing how much waste we produce even with just two of us at home.
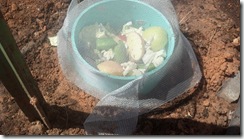 Next you place a fine mesh screen over the pipe. This keeps out the cockroaches, bee’s, fly’s, all the critters you really don’t need to feed or help reproduce, because, ew.
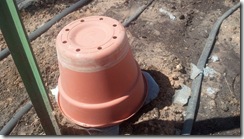 You need to cover the screen, this will help keep out other pests and keep the sun off of it. However it needs air. So we elected to use old plastic pots that were in the shed. They were big enough to fit over the pipe and did the job quite well.
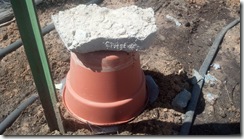 However, one good blast of our hurricane force winds we get around here and the pot would have sailed to far off places. So we placed a rock or piece of concrete on top of each pot to hold it down.
At first we were wondering if the worms were surviving, so we would dig down in there and take a look. Then comes the day when you don’t see any worms in the pipe and you wonder if they are in the bed doing their job or if they decomposed along with your kitchen scrapes. So you dig around in the bed a bit trying to see if you can see any worms. It seems a bit frustrating. But then you begin to see that the kitchen scraps you have been putting in the pipes are disappearing and so you think….well all must be well because where would the scrapes have gone?
It’s still a work in progress and I’m not sure how well it has worked yet, but in about 5 months we will plant those beds again for the first time in a year and a half and then we’ll watch and wait and we’ll see what happens. I’ll report back! I’m hoping for the best. How fantastic it will be if my soil is healed and I can continue to grow yummy things????
